This guide explains how to create a Freeform Virtual Human learning Experience.
A Medical Freeform Virtual Human is a scenario-based learning experience that allows learners to engage in conversations with a Virtual Human in a medical scenario using natural language and medical examinations. This interactive style is particularly effective for intermediate learners who aim to practice and master conversational behaviors and skills.
In this guide, we will focus on the Medical aspects of the Freeform Virtual Human. For more information on the fundamentals of Freeform Virtual Humans, check out the guide Creating Freeform Virtual Humans.
First, start by creating a Virtual Human, and then click edit to get to your Virtual Human editor.
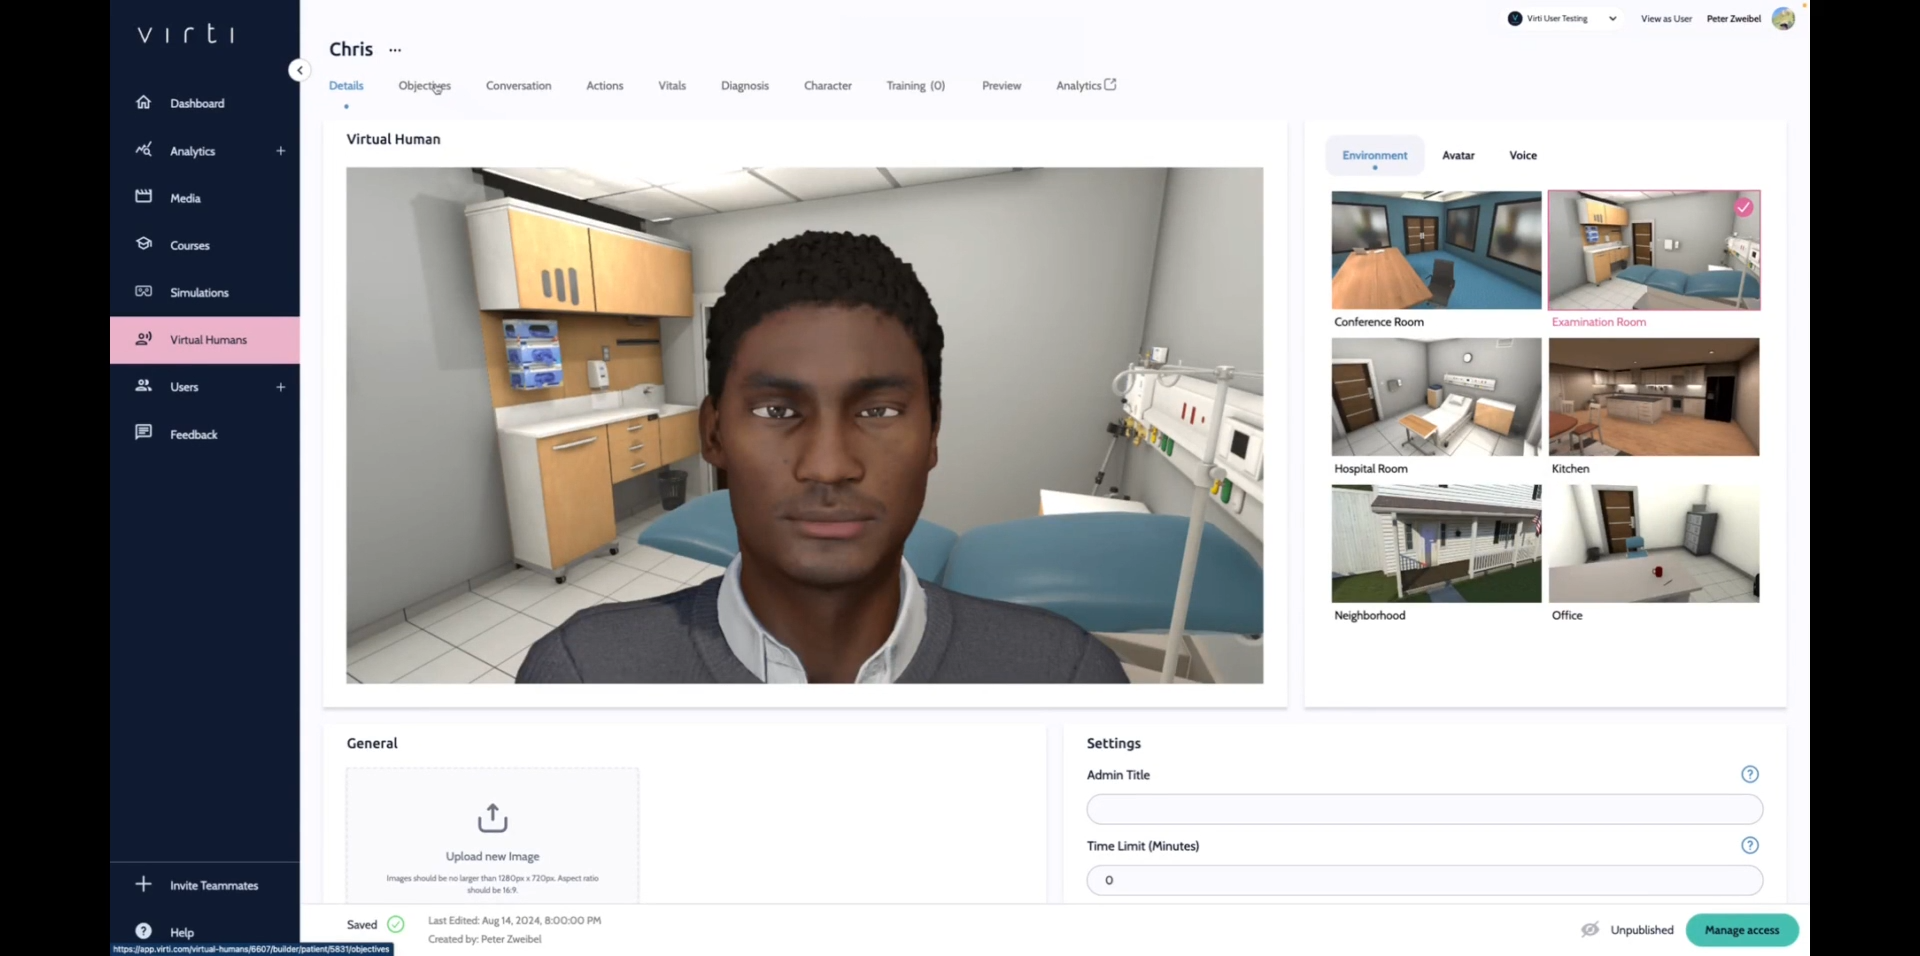
The best place to start is by adding learning objectives. In a branching Virtual Human, Learning Objectives serve as a guide to your learners (See image above), and allow you to assess performance, by letting learners gain or lose points based on the decisions they make. At the end of the session, you and your learners will be able to see how they performed, based on how many objectives they hit.
To add learning objectives, click on the Objectives tab.
Begin by adding one or more objective groups. An objective group is a top level goal such as "History of Present Illness"
Add in objectives and assign them point values. Objectives should represent behaviors that your learner should exhibit during the conversation. Such as Identify Chief Complaint

Tip: The exclamation point means that the objectives are not yet tied to a conversation item, don't worry we'll take care of that later.
Now that our scenario has objectives, we can start building out the script of the conversation. The Medical Freeform Virtual Human starts with a preset list of conversation items that are typical in the patient provider interaction. All you have to do is edit the patient's responses to the questions to create a variety of patient cases.
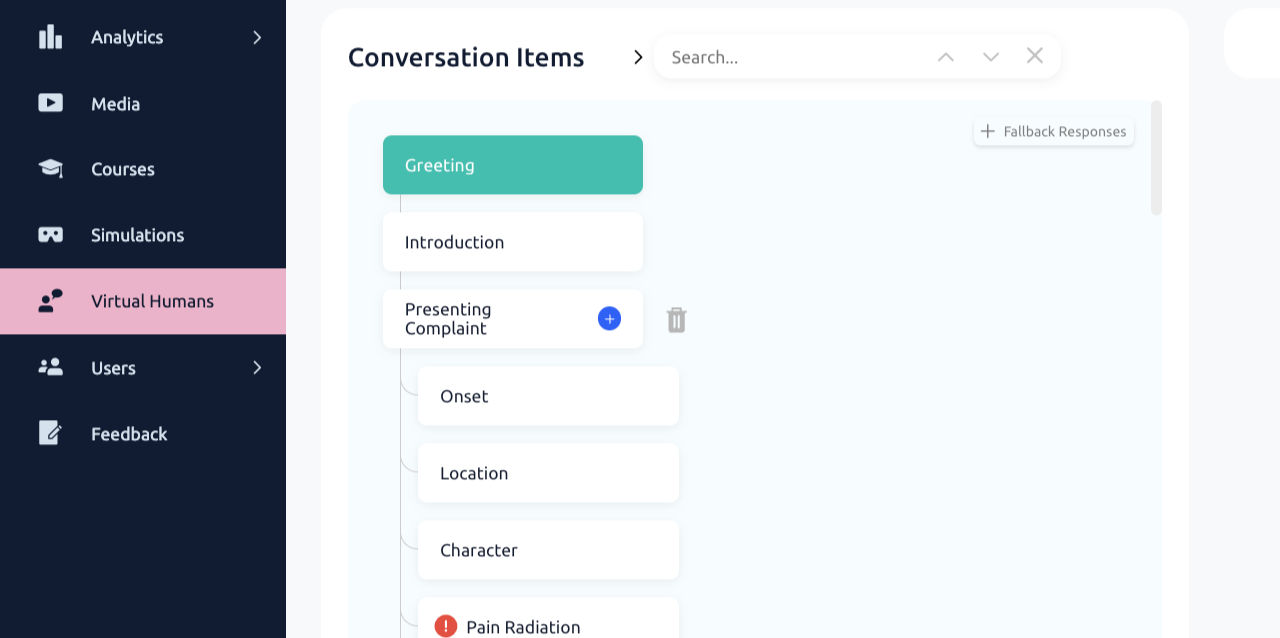
Begin by hitting the Conversation Tab:
Enter the Greeting, which will be what the Virtual Human says to start the conversation. If you would like the Learner to start the conversation, hit Skip Greeting.
Select one of the pre-set conversation items you would like to edit, such as Chief Complaint. You can see we have possible inputs here that have already been entered. You can add any other possible inputs that you would like to hit this objective.
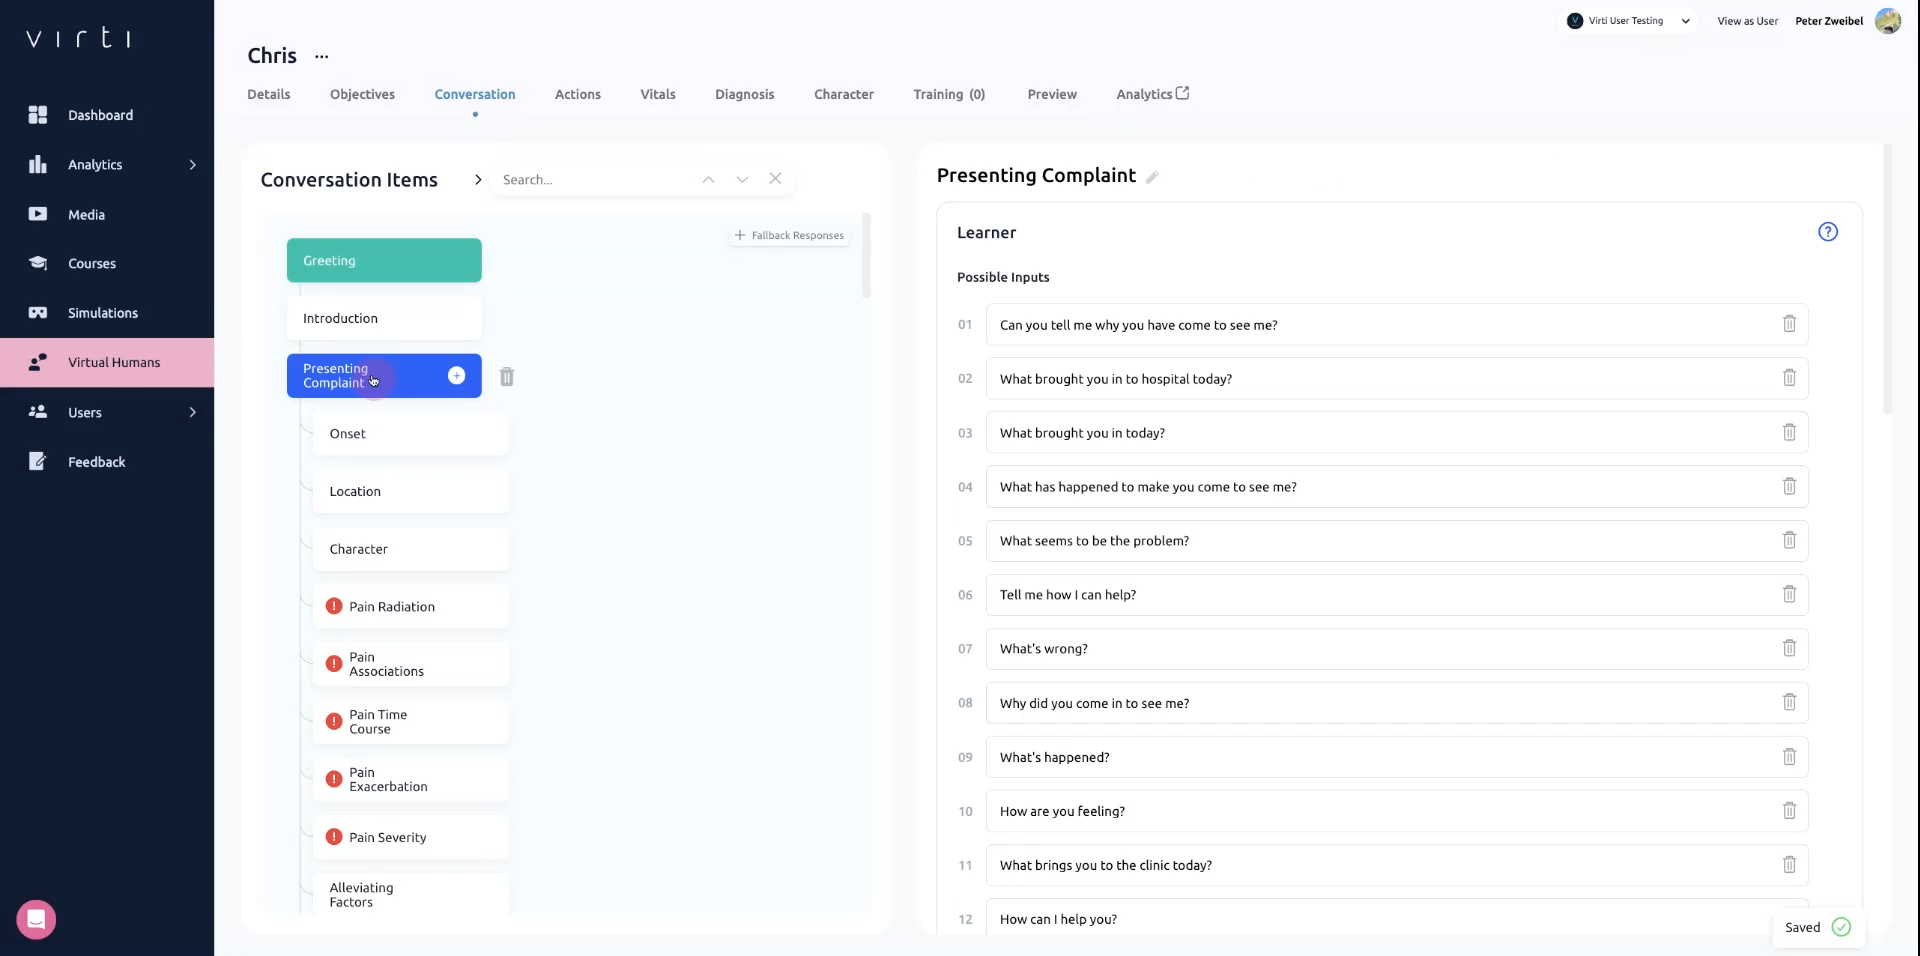
In Response Text add in your patient's response based on the scenario you are creating.
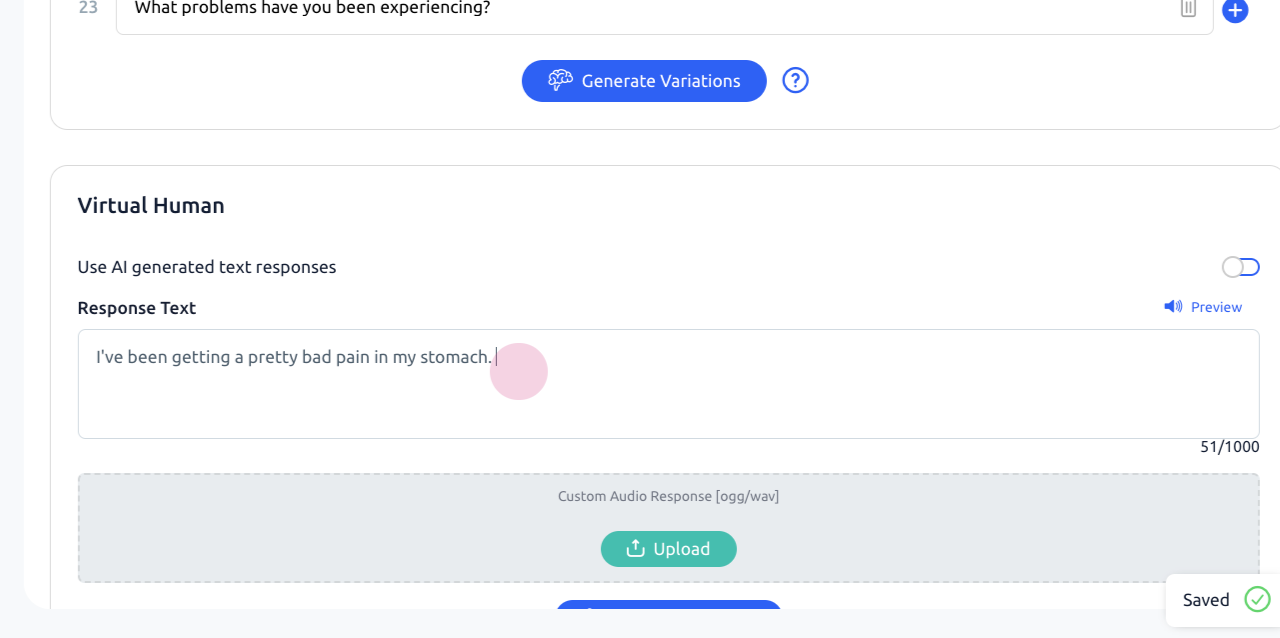
Best Practice: If you want to make sure that the Virtual Human responds in the exact same way every time to every learner, for example if the Virtual Human is play the role of a patient describing a medical condition, then it's best to have AI generated responses toggled off. If not, it is best to toggle it on, so that the AI can phrase the response correctly.
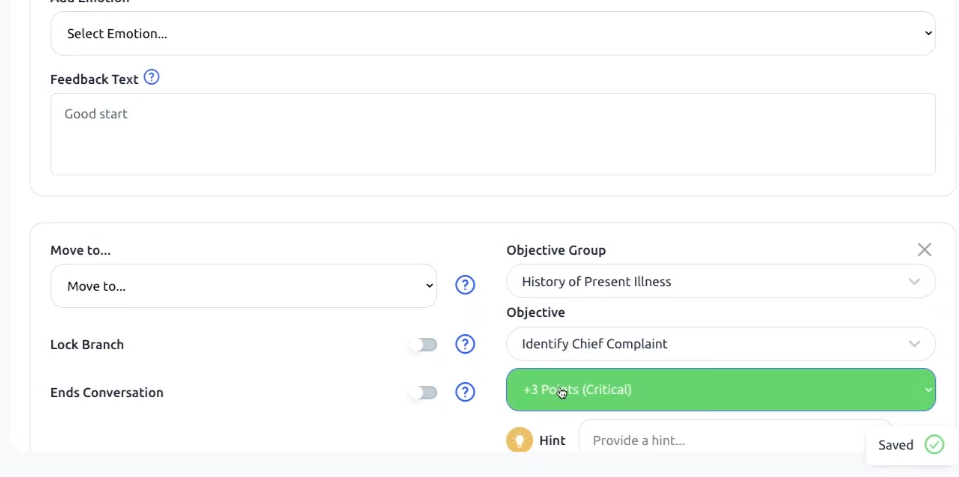
In Add Emotion select an emotion from the dropdown to have the Virtual Human change their facial expression after delivering the response.
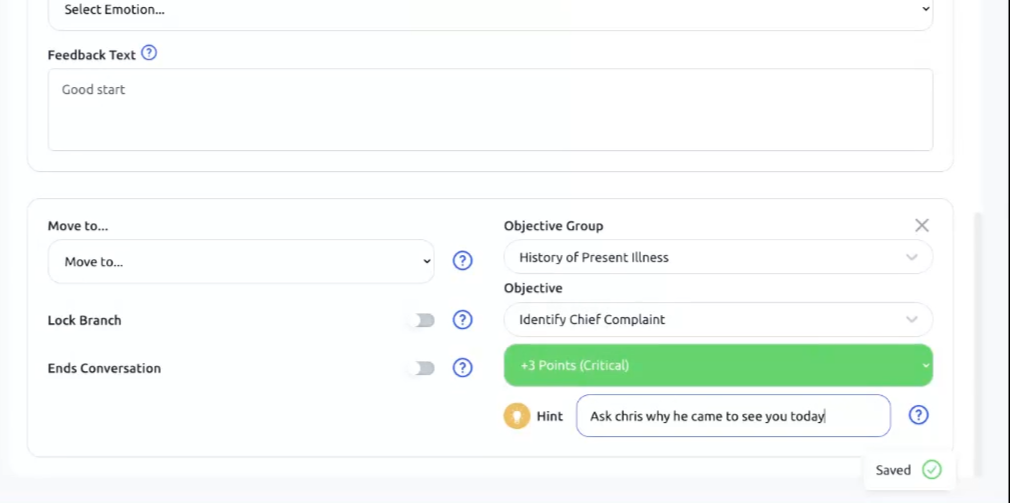
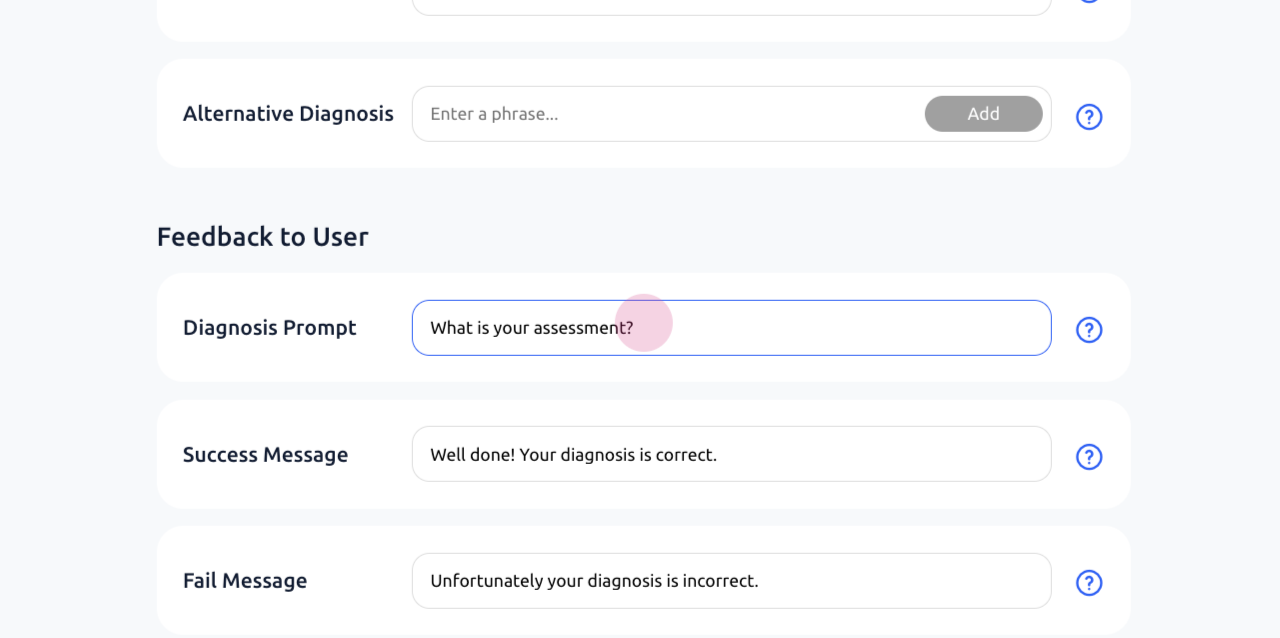
In the feedback field, provide instant feedback that will be shown to the learner when they make their choice.
Best Practice: Telling the learner why their choice was right reenforces positive behavior, and telling the learner why their choice was wrong, can help correct negative behavior.
Assign this conversation item to one of your objectives, so if your learner selects this choice, they will get credit.
You can give a hint to your learners if they get stuck. For the hint, you might say, "Ask Chris why he came to see you today"
To add another conversation item click on the green + button next to Add a Greeting

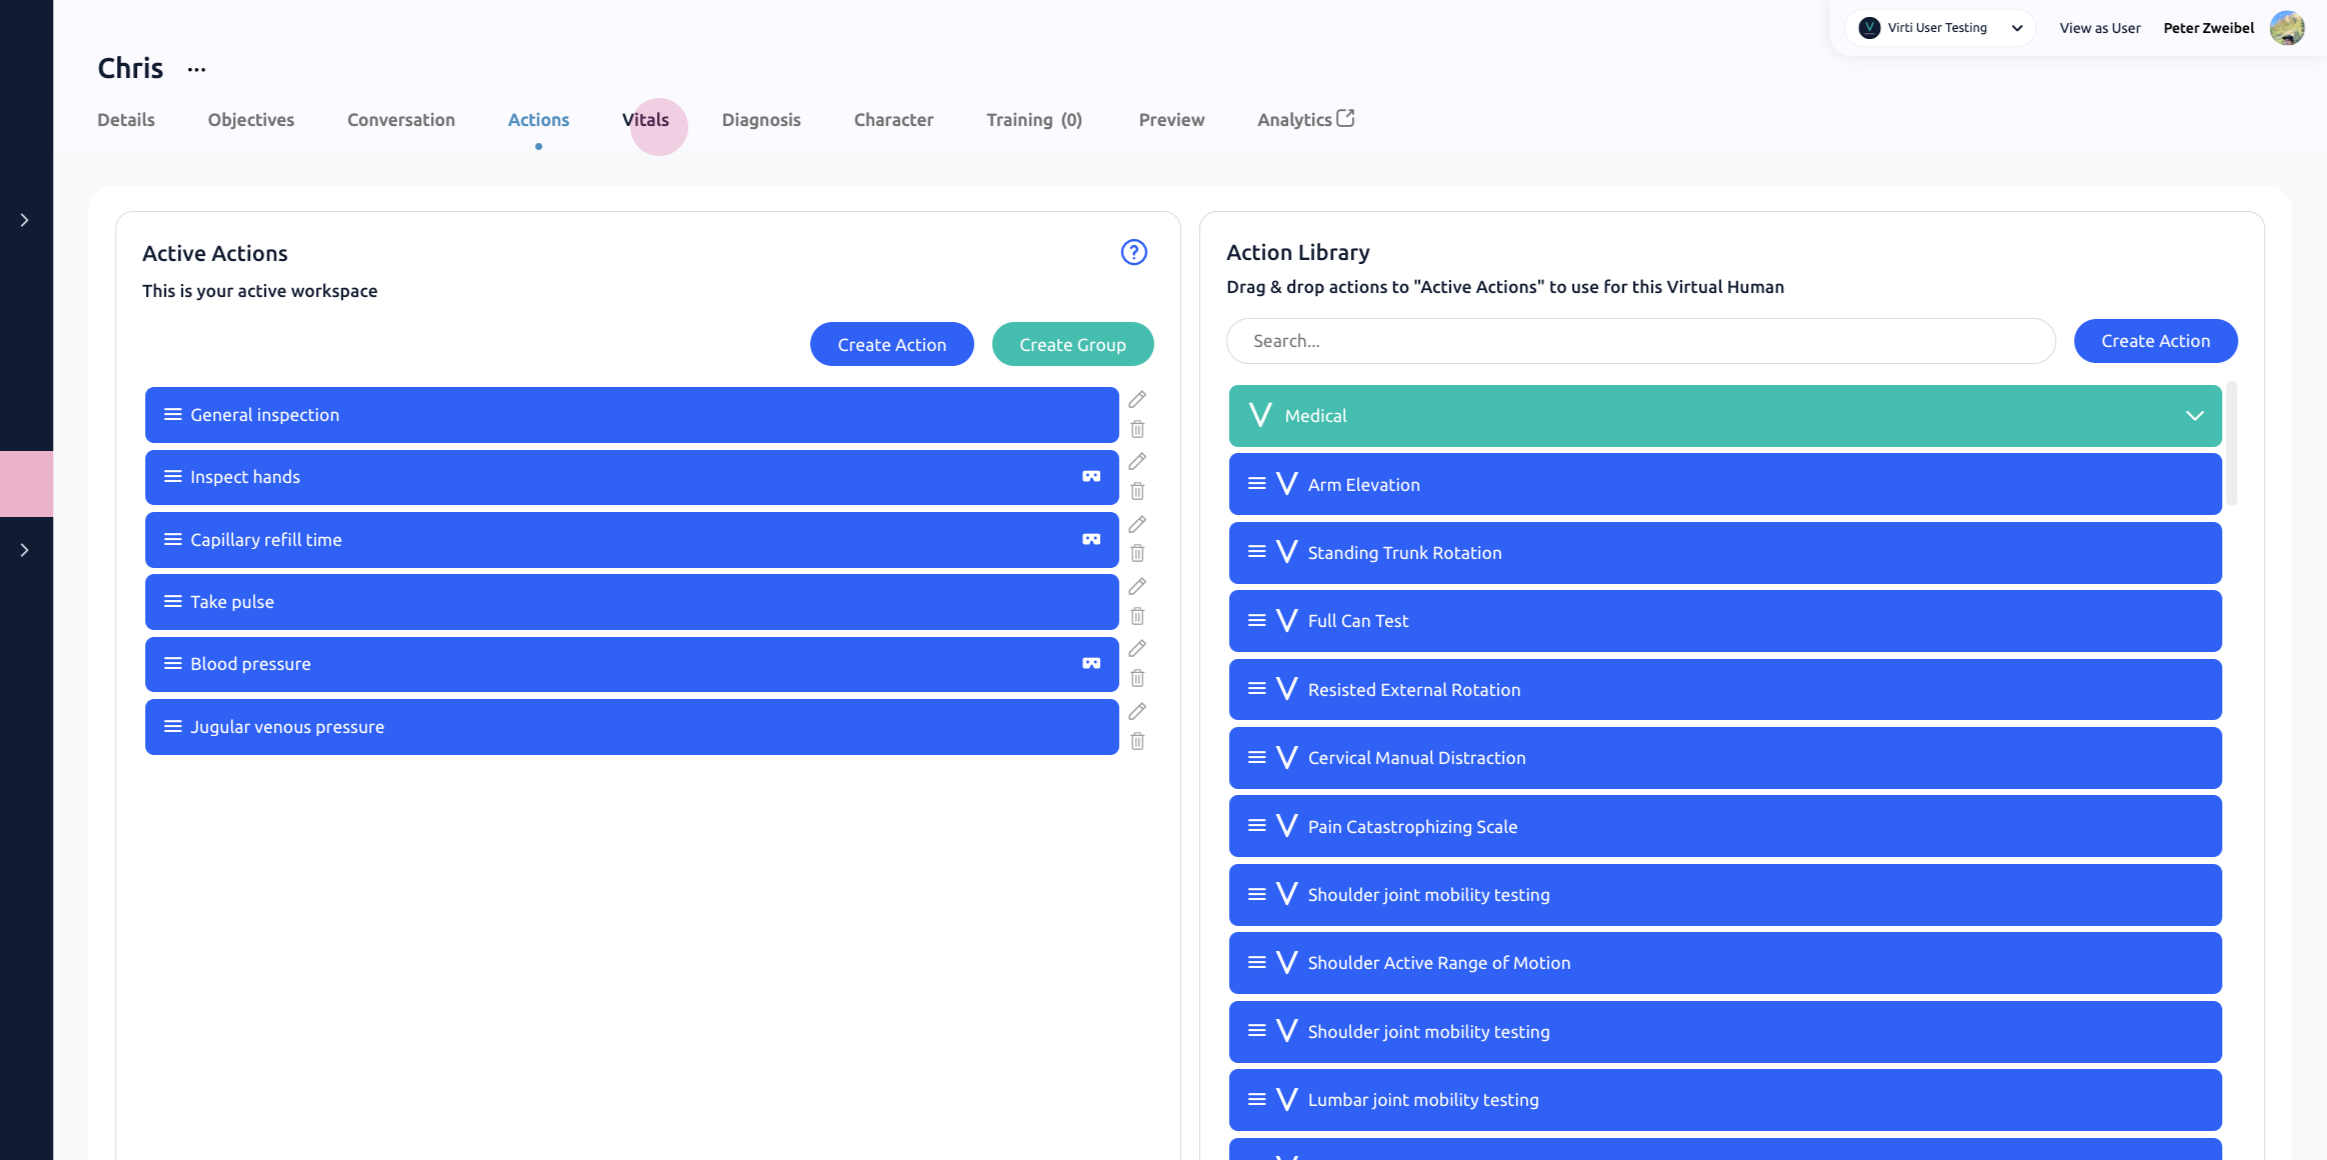
To add more realistic interaction into our scenario, we can add actions, which are non-verbal ways to interact with the patient such as physical exam maneuvers or reports. Here You'll find a list of preset actions. Check out the guide on Customizing Actions in a Virtual Human Environment.

In the vitals tab, you can select whether or not you want to display the patient's vitals to the learner in the scenario, as well as edit any of the values.
At the end of the Medical Freeform Virtual Human conversation, the learner will be assessed on a final question, such as "What is your diagnosis" or "What is your recommendation for next steps". Next, let's go to the diagnosis tab, here's where you set the final assessment for the learner. You can add one or more diagnoses that will be counted as correct.
You can adjust the diagnosis prompt, if you'd like the learner to submit something else, like a treatment option or care recommendation.
In Final Diagnosis Enter in the first correct answer
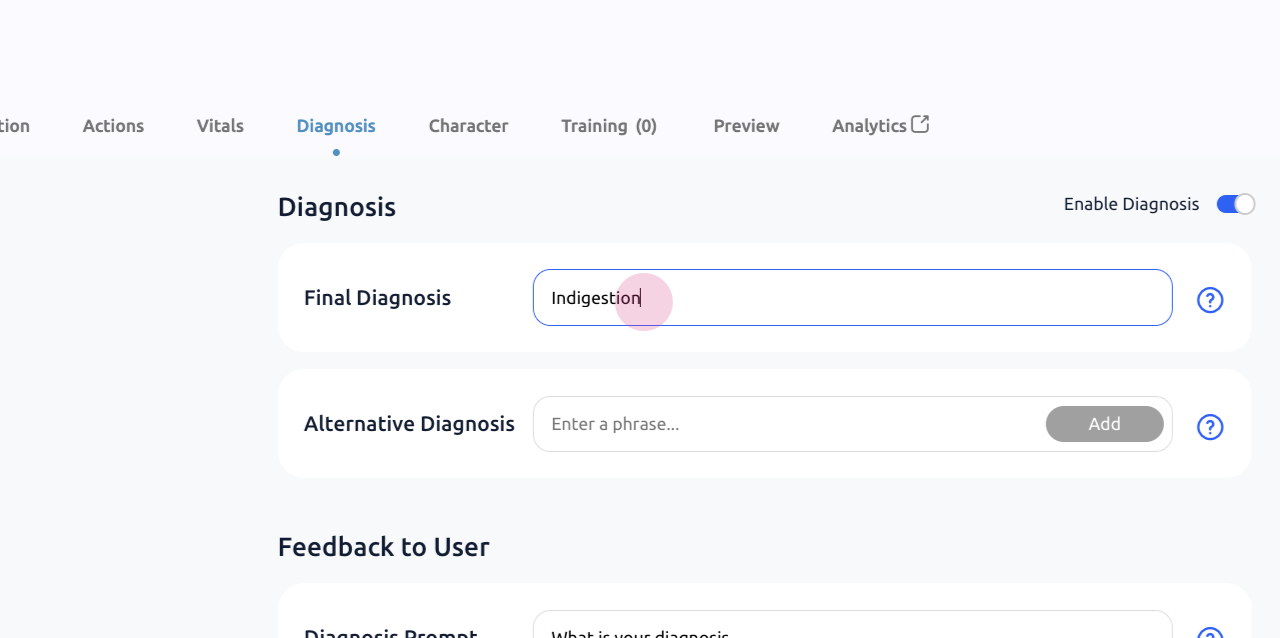
Add in any other responses you would like marked as correct into Alternative Diagnosis
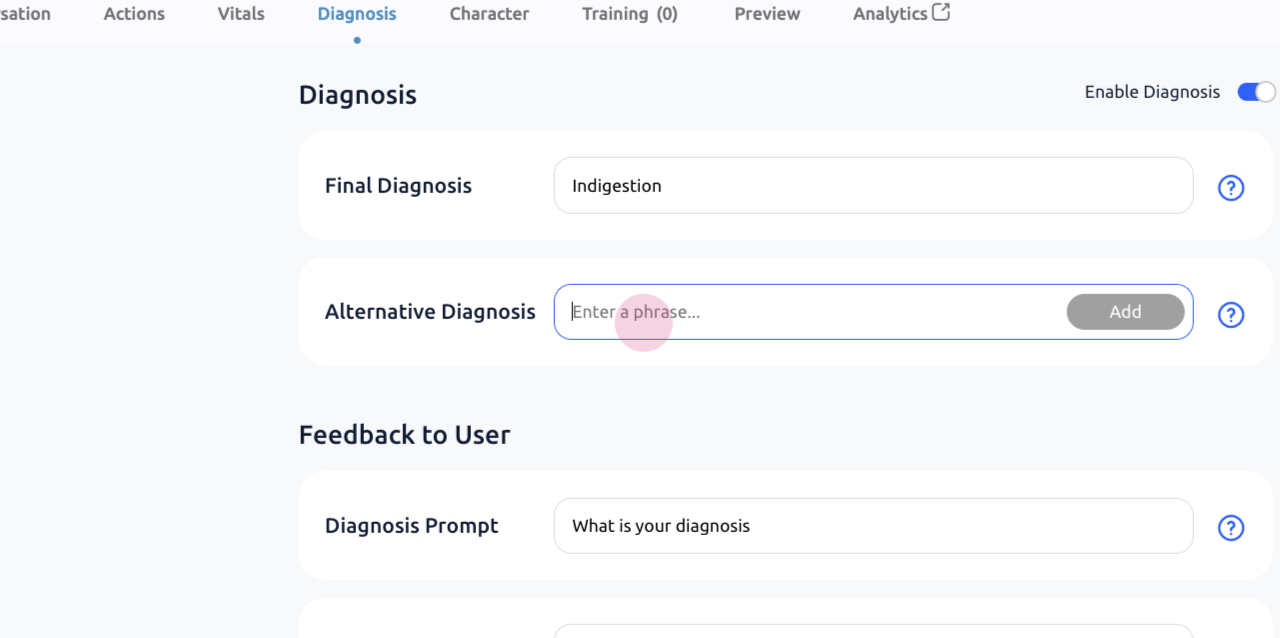
Edit the diagnosis prompt to fit your scenario. For example, if the scenario for a nurse to triage a patient, you may want to ask for something else than a diagnosis.
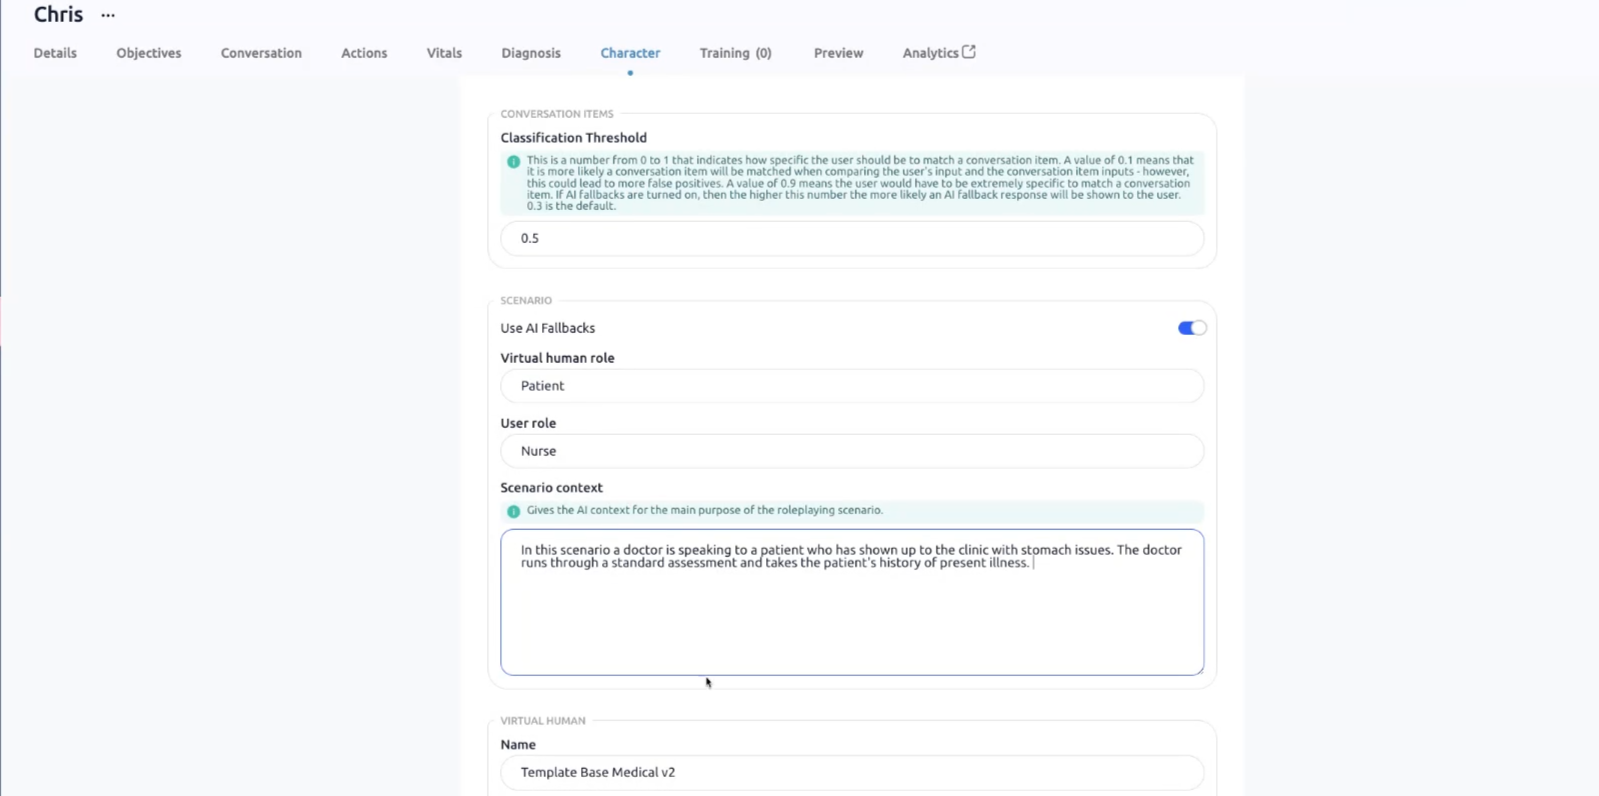
If the learner goes off script, and says something that does not match to one of the possible inputs. The Virtual Human will use generative AI provide an answer to the learner based on the information in the Character tab to keep the conversation on track.
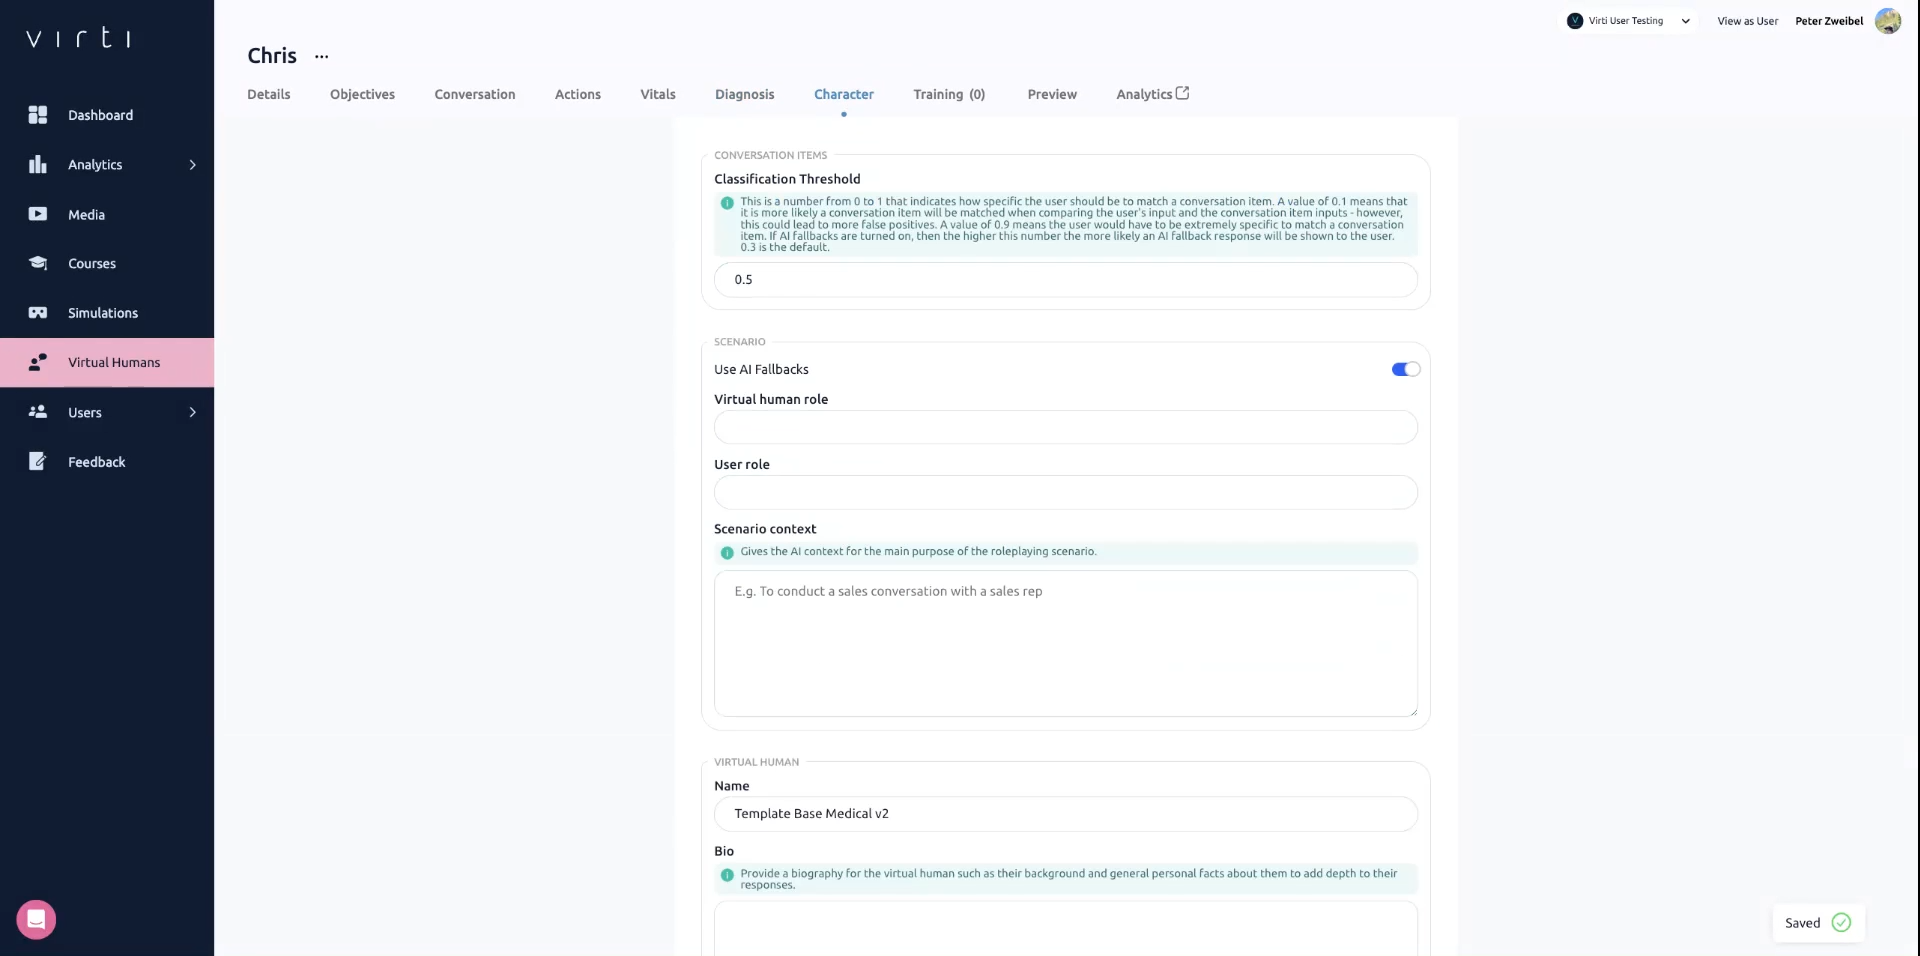
To add in this information click on the Character tab:
Start by entering in the role that the Virtual Human is playing, for example Doctor
Enter in the role that the User is playing, for example Patient
In Scenario context give the AI important context about the scene, such as who the conversation is between, the topic of the conversation, and the setting. The more details you provide, the richer and more detailed the conversation will be.
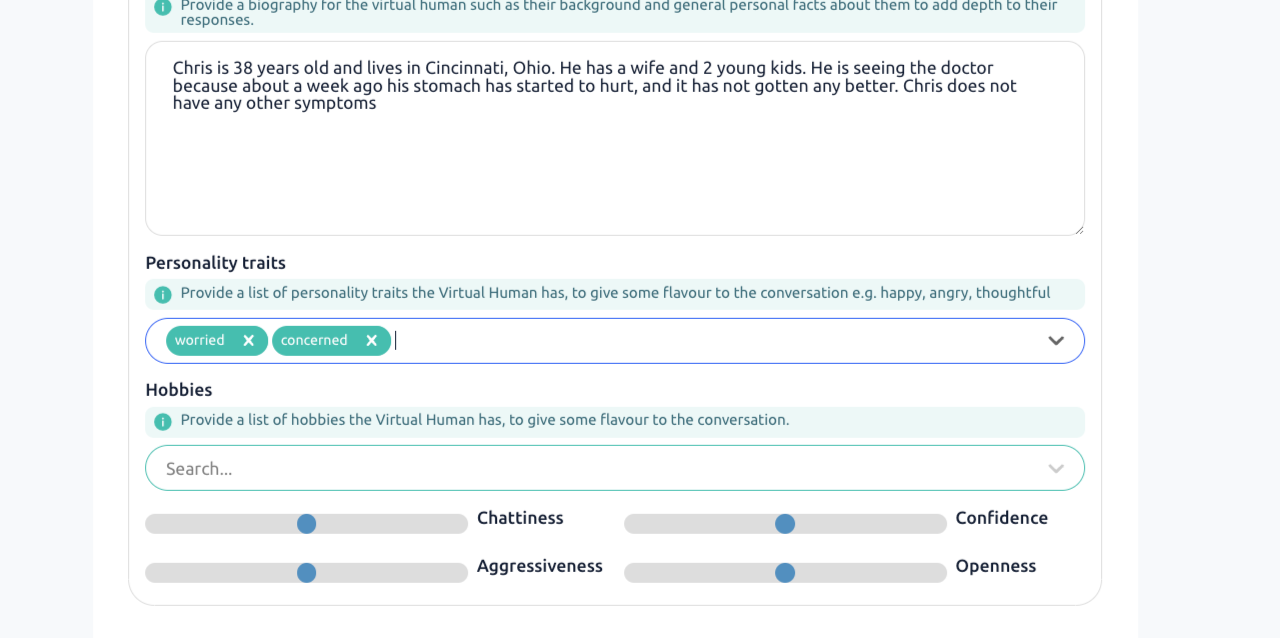
In the Bio section provide the character with a background, knowledge, and/or personal facts. Similar to the Scenario Context, the more detailed the better.

Add Personality traits, hobbies, and adjust the mood sliders to add some flavor to the conversation.
That's it! You have now created a Medical Freeform Virtual Human. After completing these steps, test the scenario to ensure everything works as expected.
Need more help? Contact [email protected]